Applying for Data Exchange Layer certificates in the e-services
This page explains how to apply for signing and authentication certificates used in the Suomi.fi Data Exchange Layer via the Digital and Population Data Services Agency’s (DVV) e‑services.
The instructions apply to manually renewed certificates as of 6 May 2026. Instructions for applying for ACME certificates will be published later.
A certificate application is submitted by:
- the organisation itself, if it owns the security server it uses, or
- an intermediary, if it provides security servers it owns for customer organisations.
What you need before applying for certificates:
- a valid right to use the Suomi.fi Data Exchange Layer
- the reference number of the Data Exchange Layer decision (note the correct environment: FI‑TEST / FI)
- an organisation customer account in DVV’s e‑services
- a CSR file and the email address of the technical contact, if you are not uploading the certificate request yourself
- a technical process address (shared email address)
The validity period and renewal interval of certificates vary depending on the certificate type and environment. You can find the current validity periods in the article Renewing soon-to-expire certificates on the security server - Suomi.fi Data Exchange Layer - Suomi.fi for Service Developers.
Contents of this guide
A) Before submitting a certificate application
B) Starting an application in the e‑services
C) Completing a new certificate application step by step
D) Renewing a certificate using a previous application as a template
E) Where to find the reference number for your certificate application
A) Before submitting a certificate application
1. What is DVV’s e‑services?
DVV's e-serviceOpens in a new window. is a service where organisations can, among other things:
- apply for certificates and organisation ID cards
- apply for data permits and conclude agreements
- manage previous applications
An organisation may have one or more customer accounts in the e‑services.
- Users from the organisation can be invited to the account.
- All users of the account can view and process matters handled through the account.
For this reason, users from outside the organisation cannot be invited to the account.
Familiarise yourself with the service's terms and conditions and service description on DVV's customer websiteOpens in a new window..
2. Customer account: creating an account and adding users
Submitting a certificate application requires a customer account in DVV’s e‑services.
First, check whether your organisation already has a customer account.
An account already exists if you have previously applied, for example, for service certificates, organisation ID cards or data permits (e.g. for Population Information System services).
Do not register a new customer account if your organisation already has one.
- Ask the person who registered the account to add you as a user.
If you are an intermediary providing security servers to customer organisations, read section 5. Instructions for intermediaries carefully.
3. Finding the reference number
A certificate application requires a reference number (diaarinumero). Find the reference number of the Data Exchange Layer decision related to the certificate you are applying for before starting the application.
- The reference number must correspond to the right to use the Data Exchange Layer under which the organisation has taken into use the security server where the certificates will be used, in the test environment (FI‑TEST) and/or the production environment (FI).
- Note! Do not use the reference number mentioned in the reminder message concerning certificate expiration. This reference number relates to a previous certificate application and is not the same as the reference number for the service access permit to the Suomi.fi Data Exchange Layer required for this application.
The reference number:
- uniquely identifies an administrative matter
- determines which security server a certificate can be issued for (note also different environments)
- is mandatory and must be correct
Note! An incorrect reference number will prevent the certificate from being issued.
You can obtain the reference number from:
- the administrative contact (often the person who completed the user permit application in Suomi.fi Service ManagementOpens in a new window.)
- the technical contact (if they have received certificate expiration reminders by email)
- your organisation’s internal documentation
- Suomi.fi Service Management (see section E on this page)
4. Choose the correct application path
Manually renewed certificates (as of 1 May 2026 for all)
- In DVV’s e‑servicesOpens in a new window.: Public sector/ Businesses and organisations → I would like to certify an electronic identity or service → Service certificate applications
ACME certificates
- The application path will be added to the instructions when DVV publishes the ACME service.
5. Instructions for intermediaries
If you act as an intermediary and provide security servers you own for customer organisations, you will apply for Data Exchange Layer certificates via your own customer account in DVV’s e‑services.
This applies to:
- authentication certificates for your security servers,
- your organisation’s own signing certificates, and
- signing certificates for your customer organisations.
Before starting the certificate application process:
- agree on the certificate process with the customer organisation, and
- prepare the necessary authorisation documentation between the intermediary and the customer organisation.
Before using the e‑services, review the terms of use and service description on DVV’s customer websiteOpens in a new window.. The terms of use describe, among other things, how intermediaries and customer organisations agree on authorisation for certificate applications.
When submitting a certificate application as an intermediary, you must provide in the application the details of the organisation on whose behalf the application is submitted. Otherwise, applying for customer organisations’ signing certificates follows the same process as when applying for certificates for your own servers.
Intermediary checklist
Customer accounts:
- An intermediary must have at least one customer account in the e‑services. All account users can view and process all matters handled via the account.
- Users from outside your organisation cannot be invited to the account. If necessary, you can add an external technical contact to an individual certificate application to handle certificate installation on the security server. The technical contact will only see and process that specific application.
Authorisation:
- Before applying for certificates on behalf of customer organisations, agree on authorisation with the customer organisations (a power of attorney can, for example, be attached to the first certificate application for each customer organisation).
Application fields:
- Administrative contact: representative of the customer organisation
- Technical process address / technical contact: intermediary’s details
Reference number:
- Reference number of the Data Exchange Layer decision concerning the customer organisation
- Note! The reference number must refer to the user permit decision under which the customer organisation has taken into use the security server you provide (FI‑TEST or FI, depending on the environment for which certificates are being applied).
- The reference number mentioned in the reminder message concerning certificate expiration cannot be used here. This reference number relates to a previous certificate application and is not the same as the reference number for the service access permit to the Suomi.fi Data Exchange Layer required for this application.
Naming applications:
- It is particularly important for intermediaries to name certificate applications clearly in the customer account, so that customer‑ and server‑specific applications can be easily identified later from an increasing list of applications.
- See section 13. Naming the application for detailed instructions.
B) Starting an application in the e‑services
1. Go to https://asiointi.dvv.fi/#!/loginOpens in a new window.. You will arrive at the e‑services home page, where you can log in. Logging in requires that a customer account has been created for your organisation (see section A).
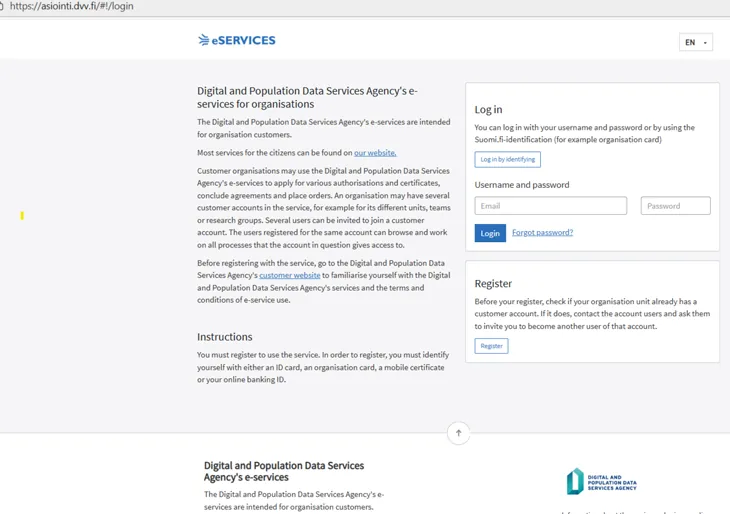
Select Log in by identifying.
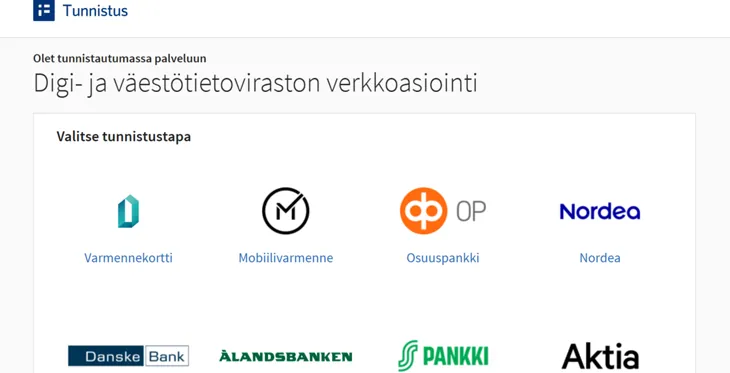
2. Choose your authentication method.
3. After logging in, select Fill in a new application.

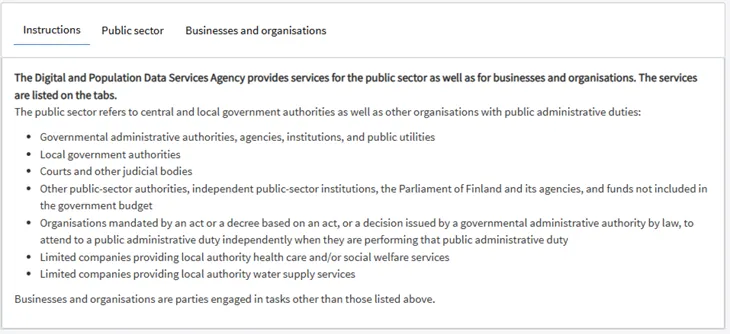
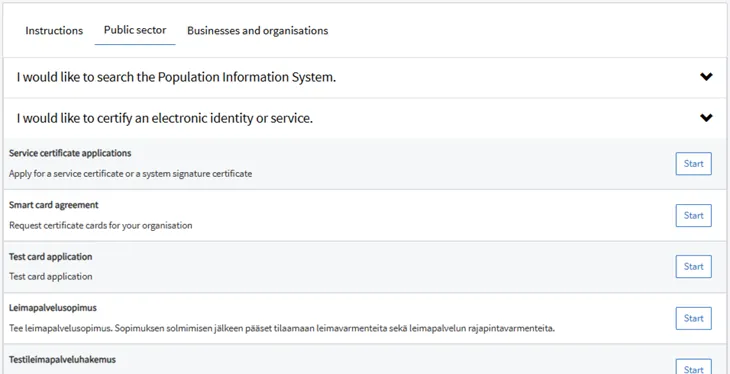
4. Select Public sector or Businesses and organisations, depending on your organisation.
5. Open I would like to certify an electronic identity or service.
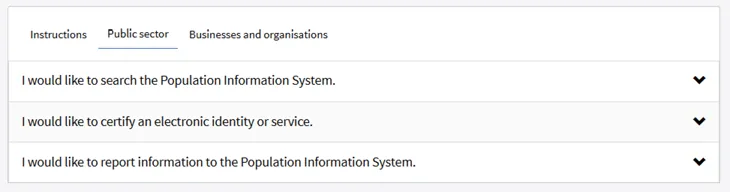
6. Next to "Service certificate applications" press Start.
C) Completing a new certificate application step by step
The application consists of four sections and acceptance of the delivery terms. Each section contains several fields.
Detailed instructions for completing the fields are provided below.
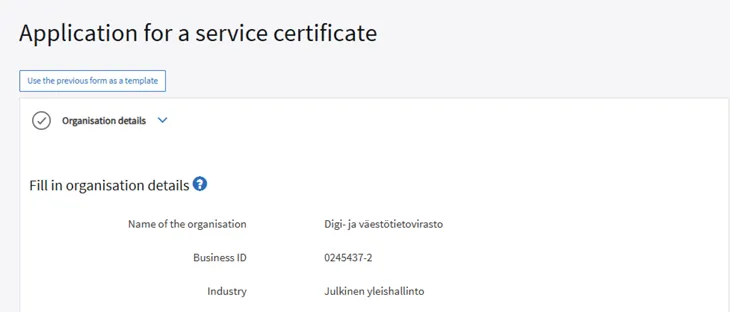
1. Organisation details
Start by opening the Organisation details section.
Some organisation details are filled in automatically based on the organisation managing the customer account in the e‑services.
- If you are completing an application on behalf of another organisation (e.g. as an intermediary), add the customer organisation’s details in the following section.

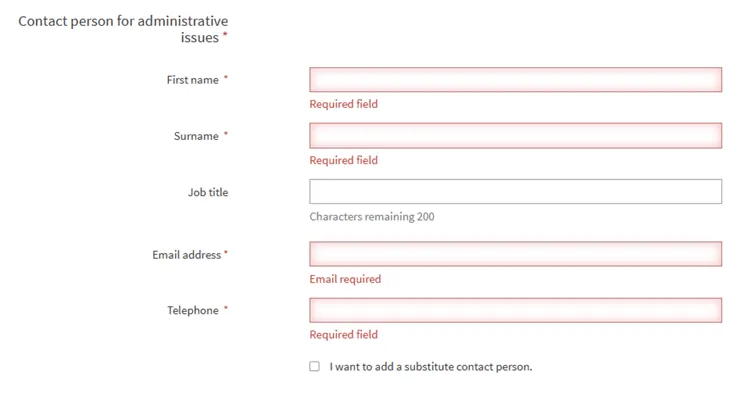
2. Administrative contact
Your own details are automatically filled in. You can edit them if necessary.
- Intermediary: If you are applying for a certificate for a customer organisation, enter the customer organisation’s details here.
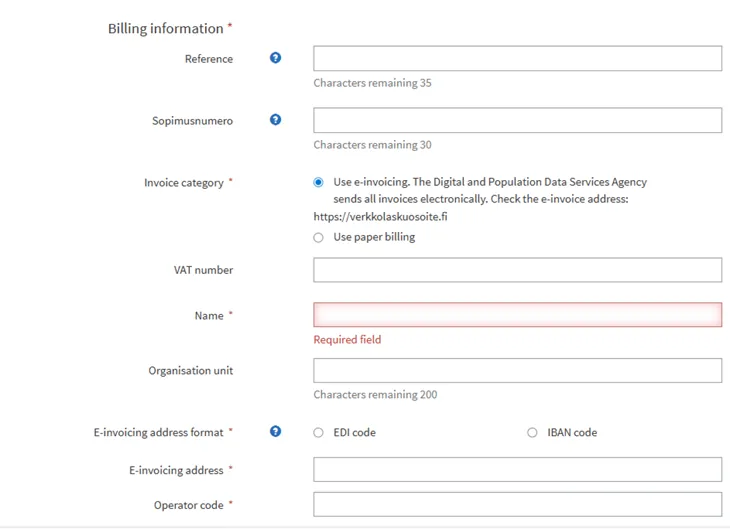
3. Billing information
Enter and/or verify the billing information. The details are requested even though KaPa certificates are free of charge for the Data Exchange Layer.
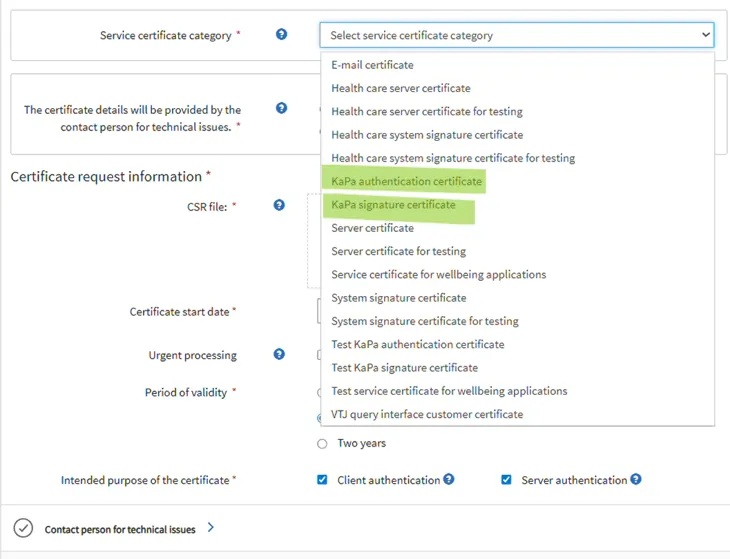
4. Application details – select the service certificate type
Note: Only KaPa certificates are used in the Suomi.fi Data Exchange Layer. Do not select other certificate types from the list.
For the test environment (FI‑TEST), select:
- Test KaPa authentication certificate for authentication certificates
- Test KaPa signature certificate for signing certificates
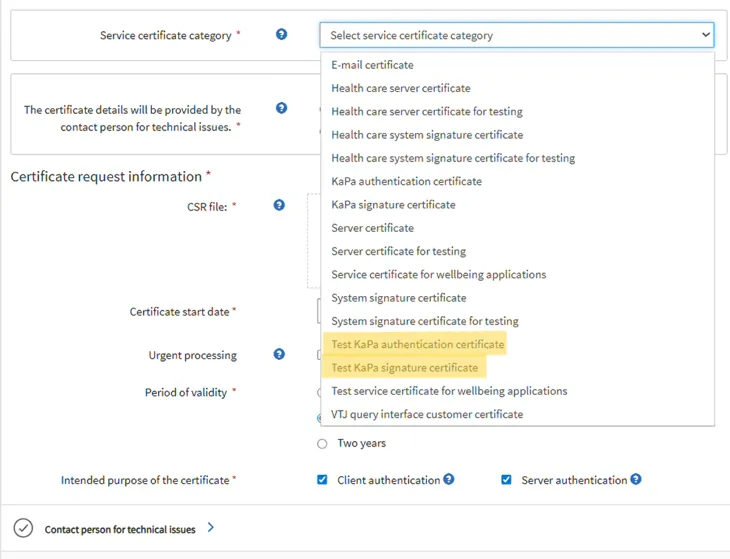
For the production environment (FI), select:
- KaPa authentication certificate for authentication certificates
- KaPa signature certificate for signing certificates
5. Adding the CSR file
Select whether you will submit the CSR file yourself or whether the technical contact will submit it separately.
If you complete the application and also install the certificate on the security server yourself (also applies to Intermediaries):
- It is recommended to select No and upload the CSR file directly as an attachment.
If you complete the application as an organisational representative and maintenance of your organisation’s servers has been outsourced to a technical service provider:
- Select Yes and enter the technical contact’s email address.
- After submission, the technical contact will receive an email with a link to upload the CSR file. DVV will send the signed certificate directly to the technical contact, who can then install it on the security server.
If you select No:
- You can attach the CSR file directly.
- Note: The public key in the CSR must be at least 2048 bits, and the file must not contain the fields Title, Givenname or Surname. If the CSR is generated in X‑Road, the key length is automatically sufficient.
If you select Yes:
- The technical contact will receive an email link to upload the CSR and enter the certificate request details.
- This is recommended if the security server owned by the organisation is managed or maintained by an external partner responsible for installing the certificate.
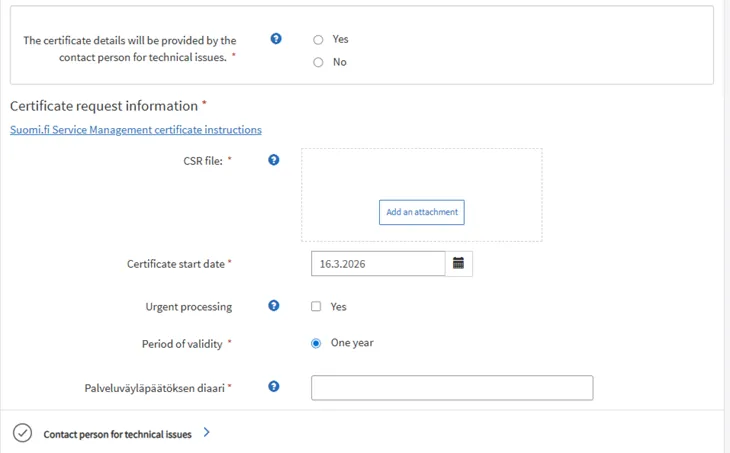
6. Other application sections
The image below illustrates the remaining fields in the Certificate request information section. You can continue to sections 7 and 8 of this guide.
7. Certificate start date
Enter the desired start date for the certificate.
We recommend that the start date of the new certificate slightly overlaps with the validity period of the current certificate. When choosing the timing, also take into account any absences and holiday periods.
- Example: If the current certificate expires on the 15th, set the start date of the new certificate, for example, to the 10th. This way, the certificates are valid at the same time for a few days.
This provides your organisation with flexibility when replacing certificates and sufficient time for actions on the security server.
8. Urgent processing (optional)
- Normal delivery time is 3–5 business days.
- If necessary, select Yes and provide justification.
9. Reference number of the Data Exchange Layer decision (Palveluväyläpäätöksen diaari)
Enter the reference number of the decision (or application) concerning the security server in the field highlighted in red in the image.
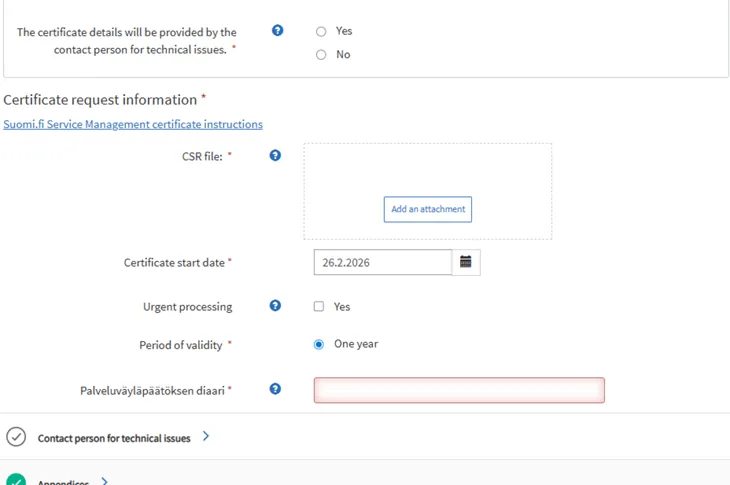
- Always primarily use the decision reference number ending in ‑2.
- The reference number of the right‑to‑use application ends in ‑1.
If the form does not accept the decision reference number ending in ‑2, you can try using the application reference number by changing the last digit 2 → 1.
10. Technical process address and technical contact
Next, enter the technical contact details.
Enter the technical contact information carefully. Certificate expiration reminders and other notifications are sent to the technical contact and the shared technical process address. A shared email address is particularly important to ensure that notifications are not missed due to staff changes or absences.
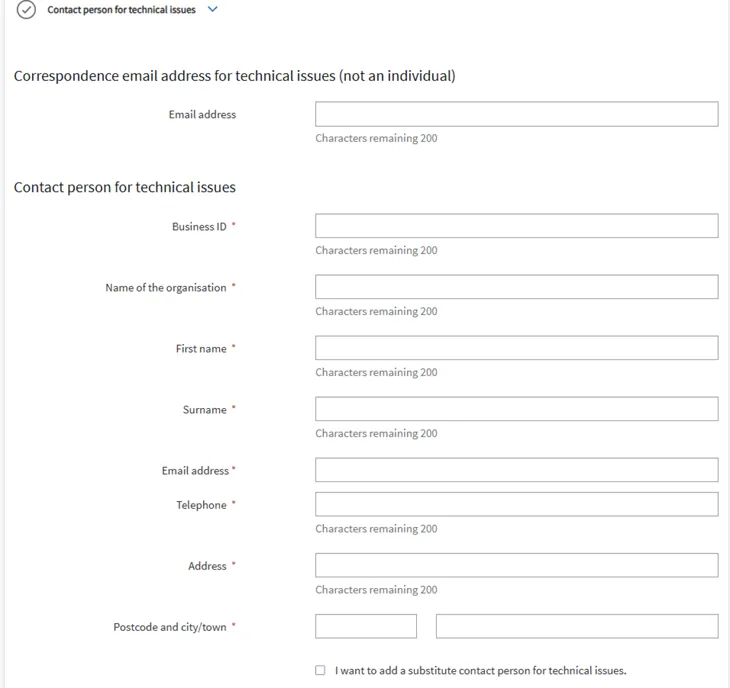
Add:
- a shared email address (not a personal one)
- technical contact details
- an optional backup contact
Expiration notifications are sent 3 months and 1 month before the certificate expires.
11. Attachments
You can add attachments, such as a power of attorney.
If you are applying for a certificate on behalf of another organisation, attaching the power of attorney or equivalent authorisation to the first application for that organisation’s certificate will help ensure smooth processing.
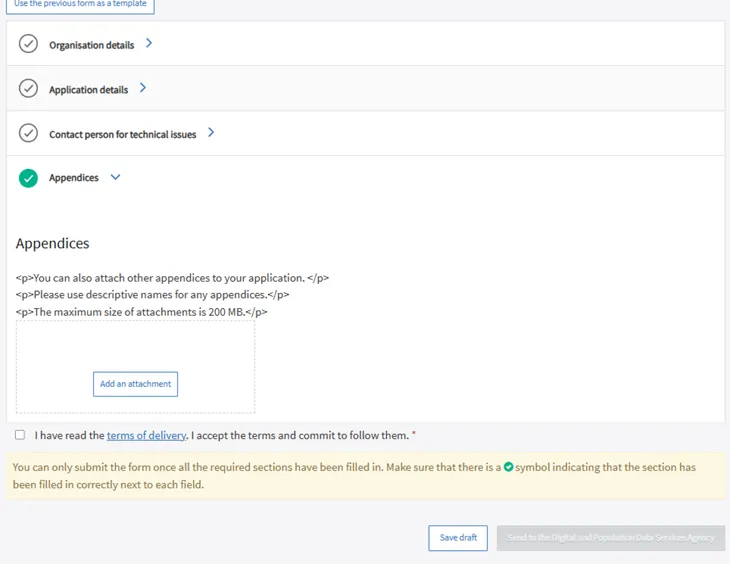
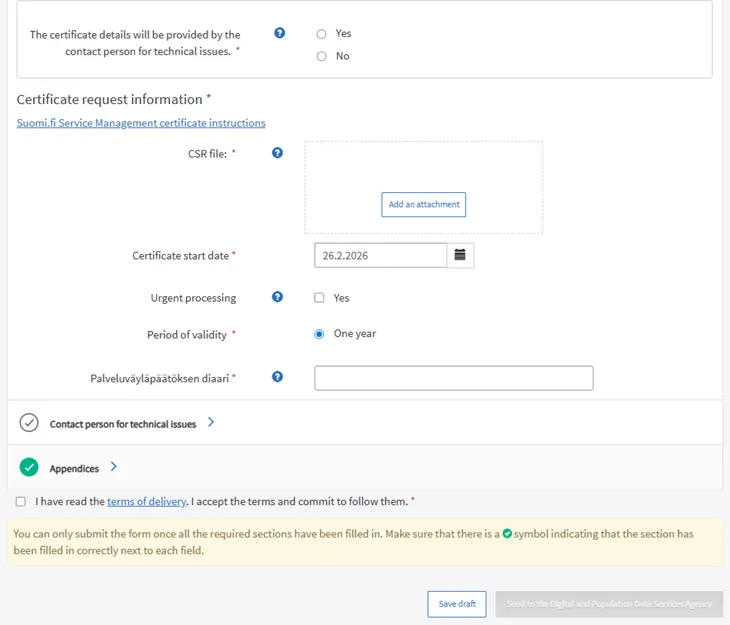
12. Delivery terms
Tick the checkbox I have read the terms of delivery.
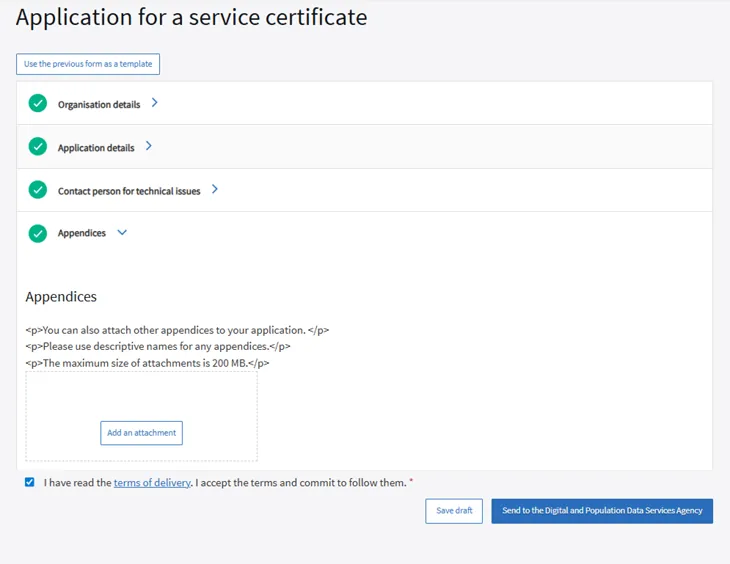
- You can save the application as a draft if needed.
- When the application is complete, select Send to the Digital and Population Data Services Agency.
13. Naming the application
Before submitting the application, you should give it a custom name.
The e‑services automatically assign a name, but this is not recommended.
Give the application a descriptive name so that you can easily distinguish it from others later.
- Over time, multiple applications will accumulate in the customer account—especially for intermediaries providing security server services.
- We recommend naming the applications in a way that helps other account users to find them easily, if needed at a later time.
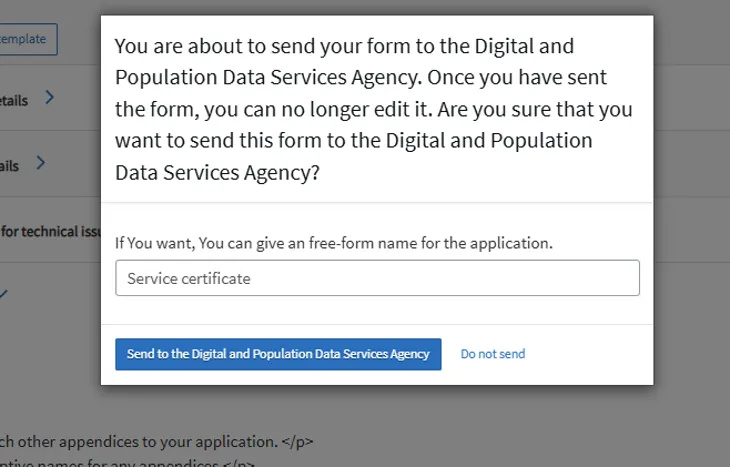
We recommend naming the application as follows:
Data Exchange Layer – FI‑TEST/FI (environment) – host part of the server name – your organisation’s name – Authentication certificate application / Signing certificate application
- Example: "Data Exchange Layer FI‑TEST dvvlptest01 DVV Authentication certificate application"
After naming the application, you can submit it by clicking Send to the Digital and Population Data Services Agency.
If you later notice that corrections or additions are needed, you can send a message to the case handler in the e‑services.
- After logging in, go to Pending cases, click the three‑line menu next to the application name, and select Send message.
14. Registering and activating signed certificates
After the certificate application has been processed, remember to register and activate the signed certificate on your security server so that it becomes operational.
- If you ordered an authentication certificate to replace an expiring certificate, register and activate it according to the instructions: Renewing soon-to-expire certificates on the security server
- If you ordered an authentication certificate for a completely new security server, register and activate it according to the environment‑specific instructions: 3. Join the test environment or 5. Proceed to the production environment
D) Renewing a certificate using a previous application as a template
You can use a previous application as a template if:
- the previous application was submitted using a decision reference number (‑2), and
- the new certificate application concerns the same security server and environment.
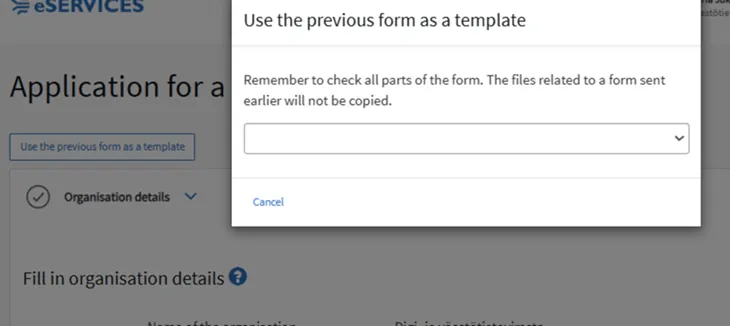
Select Use the previous form as a template.
- Then select the correct template.
Review and update the following:
- invoicing details
- certificate start date (note: select the earliest possible date, i.e. the current date)
- urgent processing (edit if necessary)
- CSR file
- technical contact details
- acceptance of delivery terms
- application name (same recommendation as for a new application)
E) Where to find the reference number for your certificate application
- Log in to Suomi.fi Service Management at https://palveluhallinta.suomi.fi/fiOpens in a new window. → Log in
- Authenticate using Suomi.fi identification.
- Make sure you are connected to your organisation’s Service Management account. Register if necessary.
- After logging in: Open the menu in the top‑right corner → Applications
- If acting on behalf of your own organisation, keep the role: Representative of your own organisation
- If acting on behalf of another organisation, select Intermediary (acting on behalf of another organisation)
- Find the correct application from the list and open it.
- Select Download application or Download decision (we recommend using the decision reference number).
- Select Open file. The document will open in a new tab.
- The reference number can be found in the top‑right corner of the document in the format DVV/XXXX/202X‑2. If you use a decision reference number ending in ‑2, you can use Use a previous application as a template for the next renewal.
- Save the reference number for the certificate application. We recommend storing it in your organisation’s internal documentation.
- Proceed to DVV’s e‑services to apply for the certificate: https://asiointi.dvv.fi/#!/loginOpens in a new window.